Showing posts with label Windows tricks. Show all posts

Windows 7 Activation Product keys


windows 7 activation keywindows 7 activation
Here is the list of some windows 7 Activation Product Key to Activate Windows 7 Beta easily.Thses keys has been collected from internet from various sources.If your are nt going to buy windows 7 in any case then use these activation keys
Windows 7 Beta 64-bit Product Key
7XRCQ-RPY28-YY9P8-R6HD8-84GH3
RFFTV-J6K7W-MHBQJ-XYMMJ-Q8DCH
482XP-6J9WR-4JXT3-VBPP6-FQF4M
JYDV8-H8VXG-74RPT-6BJPB-X42V4
D9RHV-JG8XC-C77H2-3YF6D-RYRJ9
Windows 7 Beta 32-bit Product Key
6JKV2-QPB8H-RQ893-FW7TM-PBJ73
TQ32R-WFBDM-GFHD2-QGVMH-3P9GC
GG4MQ-MGK72-HVXFW-KHCRF-KW6KY
4HJRK-X6Q28-HWRFY-WDYHJ-K8HDH
QXV7B-K78W2-QGPR6-9FWH9-KGMM7
Here’s a list of 15 Multiple Activation Product Keys (MAK)
J7PYM-6X6FJ-QRKYT-TW4KF-BY7H9
D67PP-QBKVV-6FWDJ-4K2XB-D4684
HQDKC-F3P6D-C9YYM-HRB89-QDBB7
76DX2-7YMCQ-K2WCP-672K2-BK44W
2RG93-6XVFJ-RKHQ7-D2RTT-3FMQT
TT63R-8JGWP-WWT97-R6WQC-4CVWY
YQJX6-D6TRM-VWBM7-PHDJK-YPXJH
Q7J7F-GQHBT-Q42RQ-2F8XV-2WKKM
KH4X7-JY8G7-RCD7G-BYDJW-YTPXH
WYBJ8-8QVP3-24R82-VV2VP-72Q9W
9DP2R-W78GJ-GJBKW-CKR46-H3WYT
CXB7F-WWCM4-BP9V3-2YH43-RK8Y6
W9BYV-K2TB8-4YDJT-QBQWP-KFDHB
WGDJW-B8DYC-WVKX4-6MKF4-B8PK8
2PHXF-9PBDW-D3WWY-CPDKD-XG87V
source
http://www.mydigitallife.info/2008/11/11/15-windows-7-pre-release-preview-mak-unlimited-activation-product-keys/
Just copy these product keys and use them to activate your windows 7.Use these Windows 7 Activation Product keys to check if its works for you.Comment below if you have any problems

HOW TO ACCESS FOLDER LOCK WITHOUT PASSWORD?


Method 1

Very simple

Try this: run registry by typing `regedit' after clicking Start button in Windows and then click Run. Then delete this string value:

 
HKEY_CURRENT_USER > Software > FolderLock6 > LastLockerPath

Then boot to Safe mode , hold F8 Key when start PC

Go to My Documents and search for a file name locker with extension (*FLK) or (*FLKW) and delete.

Reboot PC in normal mode , run the Folder lock program and click trial, then enter new password/confirm new password,MAKE SURE TO REMEMBER, I use 123456 for easy one

Then go to option, and uninstall the program as you wish 

Method 2

Just download any full version copy of folder lock with similar version of the one your using, example Folder lock v5.7.5 or something like that. Then just Install it. Then let it run automatically after the installation. You will be prompt to login using a new folder lock user id and folder lock registration key. You can use this

FolderLock User ID: NewSoft15805

FolderLock Registration Key: 221281703

After you have entered the information above, follow the programs procedures until registration is finish. Start folder lock and when the program ask for the password, use the folder Registration Key stated above.

Now that you have successfully entered the program, you can reconfigure it based on your preferences. Now if you want to uninstall the program which I did, click "options" and select uninstall. The system will require you to reboot your computer after it was uninstalled to remove unwanted folder lock backup files.

This worked for me but I can't guarantee if it will work for all versions. just give it a try if you want to, okay.


Method 3

Yet another option....

Folder Lock can be bypassed by:

1/ locate the folder it is locking
2/ copy the locked folder to another directory
3/ install Folder Lock (again) in the new dir.
4/ set password
5/ open the copy of the original locked folder.
--------------------------------------…
 

Method 4

 start your computer in safe mode and ACCESS THE ACTUAL FOLDER.... DO NOT RUN THE "FOLDER LOCK" PROGRAM. just navigate through explorer to the folder that you locked and it will open as normal...once in the locked folder copy or cut your files to another location then reboot in normal mode and your files will be in the new location.

i am using windows 7 ultimate and it worked as simple as that...

i don't know how to get rid of the 'folder lock' program itself without the password unless you reformat the hard drive, but at least with this method u will be able to access and move out your files from the locked folder.

once you move your files to another location, the locked folder will be empty and take up the same space as a regular empty folder so it wont be robbing your space..and the folder lock program is very small it wont have any devastating impact on your hard drive space, it can be ignored.

if you used the "vault" or "chest" folder that folder lock provides then i cant help ya there

:) Good luck!


Recuva: Recover Accidentally Deleted Files from Hard Disk, Memory Card etc


Generally, we store our important files/data in our PenDrive or Micro SD Card or Hard Disk of our computer/laptop. At times, we may come to a situation to recover our important files/data if somehow it is accidentally deleted / lost from our PenDrive or Micro SD Card or Hard Disk. The task of recovering our lost files through a professional agency is often painstaking and costly. When our critical data is lost, the recovery process of the same involves removing the drive and shipping it off to a service that could end up draining our IT budget.

What happens when we lose our important files / data on a drive? We first search those files through our computer’s built-in search option and if the files / data are not found on the drive we pull out that drive and look for a third-party solution which could cost us heavily. But here is one simple way to recover our accidentally lost important (critical) files, images etc. stored on our drive(s).

Files we have deleted/accidentally lost and then recently emptied from our Recycle Bin are often still present on our (or USB Flash drive or Pen Drive or Media Card, SD Card etc.) and hence can be recovered easily using free file recovery programs. These file recovery program can help us to un-delete our important files stored on our drive(s).


So before you go for a third-party agency for recovering your Lost Files on your drive(s), I suggest you to download & install Recuva, a file recovery software developed by Piriform, and try to recover you files through it. Recuva is a free file recovery utility software that makes it extremely easy to locate files that were once thought to be lost forever. This helps you to restore files that have accidentally been deleted from your computer. This includes files emptied from the Recycle bin as well as images and other files that have been deleted by user error from digital camera memory cards or MP3 players. It will even bring back files that have been deleted by bugs, crashes and viruses. It even works on a micro SD card. Some days ago I, my younger brother deleted all my files on my mobile’s memory card. I then immediately run my memory card through Recuva and got everything back.


Recuva File Recovery Utility as has been reviewed by major software review sites such as PC World, Download Squad, LifeHacker, MakeUseOf and recommended as a must have file recovery utility for every user.


So, if once you lost any file or found a corrupt file or else on your drive due to Power failure, virus attack, hardware failure etc., first try to recover them by yourself using Recuva before send them over a professional data recovery services.

Direct Download Link for RECUVA is given below. So, download Recuva to recover your recently lost files without worrying the best Free File Recovery Tool.

Hence it is highly recommended to Download Recuva : the Best Free File Recovery Tool. & Share your Reviews / Write Your Comments Here:

Increase Internet Speed | Bandwidth 20% Trick in Windows XP


Bandwidth, in terms of computer networking, is the measure of data transfer speed. Accessing Internet with high speed has always been first choice of every net users. But due to lack of infrastructure available in most of places, only limited internet speed | bandwidth is available to most of the internet | broadband users.

In Windows XP there is some amount of internet bandwidth reserved | hidden itself by Windows. So today I am telling you that hidden trick | tweak available in Windows XP (SP2 & above) to increase your internet speed | bandwidth by 20%. Actually, this 20% of Internet Bandwidth is reserved by Windows to perform Windows Update & such other tasks. Since, Windows is not always required to be updated, you can enjoy this reserve Internet Bandwidth for your System for faster internet.

Easy steps involved for increasing internet | broadband speed are listed below. The first list contains only steps in short but in the second list you will find steps to boost your internet speed along with screenshots.

  1. Click on Start Button   >>>  Run  >>>  Type in there "GPEDIT.MSC"  [do not include quote(" ") there] >>> HIT "ENTER" Key.
  2. Doing this opens a Window Titled "Group Policy".
  3. This Window contains a Tree View like structure in the Left Pane.
  4. On that Tree Structure Click on: Local Computer Policy  >>>  Computer Configuration  >>>  Administrative Template  >>>  Network  >>>  QOS Packet Scheduler.
  5. You can now see "Limit Reservable Bandwidth" appeared in the Right Pane of the Window.
  6. Now, Double Click on the "Limit Reservable Bandwidth", this will Open a Pop-Up window (which may say it that "Limit Reservable Bandwidth" is not configured but do not worry and proceed).
  7. Now, Click on Enabled and type 0 [i.e. fill in ZERO] in the Bandwidth limit (%) Box.
  8. Finally, Click on Apply  >>>  OK.
  9. Done, you can now easily observe it that your internet speed is increased by 20%.

  1. Click on Start Button   >>>  Run  >>>  Type in there "GPEDIT.MSC"  [do not include quote(" ") there] >>> HIT "ENTER" Key.
    First Step to Increase Internet | Broadband Speed
    Increase Internet Speed : Step 1 (a)

    First Step to Increase Internet | Broadband Speed
    Increase Internet Speed : Step 1 (b)

  2. Doing this opens a Window Titled "Group Policy".
    Second Step to Increase Internet | Broadband Speed
    Increase Internet Speed : Step 2

  3. This Window contains a Tree View like structure in the Left Pane.
    Third Step to Increase Internet | Broadband Speed
    Increase Internet Speed : Step 3

  4. On that Tree Structure Click on: Local Computer Policy  >>>  Computer Configuration  >>>  Administrative Template  >>>  Network  >>>  QOS Packet Scheduler.
    Fourth Step to Increase Internet | Broadband Speed
    Increase Internet Speed : Step 4

  5. You can now see "Limit Reservable Bandwidth" appeared in the Right Pane of the Window.
    Fifth Step to Increase Internet | Broadband Speed
    Increase Internet Speed : Step 5

  6. Now, Double Click on the "Limit Reservable Bandwidth", this will Open a Pop-Up window (which may say it that "Limit Reservable Bandwidth" is not configured but do not worry and proceed).
    Sixth Step to Increase Internet | Broadband Speed
    Increase Internet Speed : Step 6

  7. Now, Click on Enabled and type 0 [i.e. fill in ZERO] in the Bandwidth limit (%) Box.
    Seventh Step to Increase Internet | Broadband Speed
    Increase Internet Speed : Step 7

  8. Finally, Click on Apply  >>>  OK.
    Eighth Step to Increase Internet | Broadband Speed
    Increase Internet Speed : Step 8

  9. Done, you can now easily observe it that your internet speed is increased by 20% 
  10. .Loved this article for making your internet speed broadband | GPRS bandwidth. So enjoy surfing web with increased internet speed on your PC | Laptop. Do share your views | thoughts on increasing your internet | broadband speed.

How to Save the download image file in any format


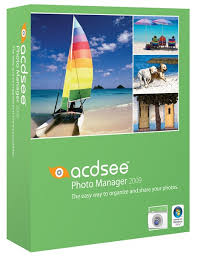
How to use ACDSee Photo Manager

ACDSee Photo Manager 12 | Product Sheet

ACDSee Photo Manager 12 is the easy-to-use and lightning-fast
photo software with everything individuals and organizations need
to view, organize and share their images. Instantly browse and
manage existing collections, import new photos, nd any image
fast, and quickly share through e-mail, prints and online albums.
Customers


Who needs ACDSee Photo Manager 12?
ACDSee 12 is ideal for organizations and anyone with a need
to quickly view, manage, and search through large image
collections. ACDSee 12 can be used by amateur photographers,
home memory keepers, architects, engineers, law enforcement
agencies, and insurance companies to e ectively and easily  stay
on top of their growing collections.

Complementry Products


Point-and-shoot cameras, scanners, and printers are
complementary products to ACDSee Photo Manager 12, and
make for ideal bundles.  For DSLR cameras, select ACDSee Pro.

Competitive Benefits


Why should someone choose ACDSee Photo Manager 12 over
another software tool?
Unlike other photo management applications on the market,
ACDSee 12 o ers these unique advantages:
•  With more than a 100 photo management and sharing features,
ACDSee Photo Manager 12 o ers incredible value for the dollar.
•  ACDSee 12 features a simple interface, organized around the
key steps of managing, viewing, editing and publishing photos,
that is intuitive and easy to use.
•  Users will save time managing photos. With ACDSee 12, users
can organize as they import, zoom through photos at full-screen,
and quickly publish photos online.
•  Users don’t need to waste time importing and exporting les
in and out of the application. With ACDSee 12, they have live
instant access to folders and images on their system and
connected devices.
can manage their images whatever way works best for them
– whether that is folders, ratings, categories, metadata, or a
combination of these options.

Key Benefits


ACDSee Photo Manager 12 is designed to save
users time, with features that make it easy to
quickly view, organize and share their photos.


Selling Points


• High value for the dollar: ACDSee 12
provides all the state of the art tools
users need for their photos in one
easy to use, integrated and a ordable
application. ACDSee 12 removes the
need for multiple applications, including
expensive software with high learning
curves.
• Unbelievably fast viewing and
browsing: View your digital image assets, from JPEG to RAW,
with the fastest image viewing technology available. Speed
through thumbnails, review images at full size, or zoom in to
examine the details.

• Find photos fast: Find any photo with powerful tools that allow
you to search by folder, keyword, category, le properties and
more. Save detailed searches for ongoing use, and run them in
one step.
For individuals and organizations
looking for even more control
over their images, ACDSee Pro is
for them. Its advanced features are
designed for users who need to
process RAW les, batch edit large
groups of images, and add IPTC
information to multiple images.
• Extensive le support: ACDSee 12 can
handle the most complex image libraries.
View, manage, and get extensive format
support for  photos, audio, and video
clips including BMP, GIF, JPG, PNG, PSD,
MP3, MPEG, TIFF, WAV and many others.
• Browse photos instantly: Unlike other
photo applications, there’s no need
to waste time importing les that are
already on the computer, connected
devices and networks. Simply open
ACDSee 12 to instantly view existing
folders and images live, in real time.

Solving Pain Points


What common problems does ACDSee Photo Manager 12 solve?
• ACDSee 12 eliminates the need for users to juggle multiple
applications in order to perform simple tasks with their
photos. ACDSee 12 makes it easy to import, view, adjust and
organize photos, and to share them in a variety of ways. There’s
no need to use another application when it comes to managing
a growing collection of photos.
ACDSee Photo Manger 12
includes a free* ACDSee Online
account with 2 GB of storage
space for convenient image
hosting and sharing. Additional
online storage space is available
for purchase.
• ACDSee 12 helps you avoid a
disorganized photo system, saving you
time and frustration. Never lose track of
another photo again. ACDSee 12 comes
with fast and exible search tools to nd
any image based on its le properties,
metadata, keyword, category, or rating.
With ACDSee 12, you’ll always know
where your photos are.

The Master List of New Windows 7 Shortcuts


Windows 7 adds loads of great shortcuts for switching between apps, moving windows around your screen, moving them to another monitor altogether, and much more. Here's a quick-reference master list of the best new Windows 7 shortcuts.
We're nuts for keyboard shortcuts here at Lifehacker, and Windows 7 brings a handful of great new ones to add to your muscle memory. It's also got a few handy mouse-based shortcuts you'd do well to add to your repertoire. So let's get shortcuttin'.

Window Management Shortcuts

One of the best changes in Windows 7 is the ability to "snap" windows to the side of the screen, maximize them by dragging to the top of the screen, or even move them to another monitor with a shortcut key. Check out the video for a demonstration of how some of the keys work.


The full list of keyboard shortcuts includes:
  • Win+Home: Clear all but the active window.
  • Win+Space: All windows become transparent so you can see through to the desktop.
  • Win+Up arrow: Maximize the active window.
  • Shift+Win+Up arrow: Maximize the active window vertically.
  • Win+Down arrow: Minimize the window/Restore the window if it's maximized.
  • Win+Left/Right arrows: Dock the window to each side of the monitor.
  • Shift+Win+Left/Right arrows: Move the window to the monitor on the left or right.
You can also interact with windows by dragging them with the mouse:
  • Drag window to the top: Maximize
  • Drag window left/right: Dock the window to fill half of the screen.
  • Shake window back/forth: Minimize everything but the current window.
  • Double-Click Top Window Border (edge): Maximize window vertically.

The Master List of New Windows 7 Shortcuts

Taskbar Shortcuts

In Windows 7, using the Windows key along with the numbers 1-9 will let you interact with the applications pinned to the taskbar in those positions – for example, the Windows key + 4 combination would launch Outlook in this example, or Win+Alt+4 can be used to get quick access to the Outlook Jump List from the keyboard.
The Master List of New Windows 7 Shortcuts
You can use any of these shortcut combinations to launch the applications in their respective position on the taskbar, or more:
  • Win+number (1-9): Starts the application pinned to the taskbar in that position, or switches to that program.
  • Shift+Win+number (1-9): Starts a new instance of the application pinned to the taskbar in that position.
  • Ctrl+Win+number (1-9): Cycles through open windows for the application pinned to the taskbar in that position.
  • Alt+Win+number (1-9): Opens the Jump List for the application pinned to the taskbar.
  • Win+T: Focus and scroll through items on the taskbar.
  • Win+B: Focuses the System Tray icons

In addition, you can interact with the taskbar using your mouse and a modifier key:
  • Shift+Click on a taskbar button: Open a program or quickly open another instance of a program.
  • Ctrl+Shift+Click on a taskbar button: Open a program as an administrator.
  • Shift+Right-click on a taskbar button: Show the window menu for the program (like XP does).
  • Shift+Right-click on a grouped taskbar button: Show the window menu for the group.
  • Ctrl+Click on a grouped taskbar button: Cycle through the windows of the group.

More Useful Hotkeys You Should Know

The Master List of New Windows 7 ShortcutsThe new hotkey goodness didn't stop with the taskbar and moving windows around—one of the best new hotkeys in Windows 7 is the fact that you can create a new folder with a hotkey. Just open up any Windows Explorer window, hit the Ctrl+Shift+N shortcut key sequence, and you'll be rewarded with a shiny "New Folder" ready for you to rename.
Here's a few more interesting hotkeys for you:
  • Ctrl+Shift+N: Creates a new folder in Windows Explorer.
  • Alt+Up: Goes up a folder level in Windows Explorer.
  • Alt+P: Toggles the preview pane in Windows Explorer.
  • Shift+Right-Click on a file: Adds Copy as Path, which copies the path of a file to the clipboard.
  • Shift+Right-Click on a file: Adds extra hidden items to the Send To menu.
  • Shift+Right-Click on a folder: Adds Command Prompt Here, which lets you easily open a command prompt in that folder.
  • Win+P: Adjust presentation settings for your display.
  • Win+(+/-): Zoom in/out.
  • Win+G: Cycle between the Windows Gadgets on your screen.

Windows 7 definitely makes it a lot easier to interact with your PC from your keyboard—so what are your favorite shortcuts, and how do they save you time? Share your experience in the comments.